Warehouses & Bins Configuration
Proper physical organization of your warehouse is the key to efficient picking, packing, and inventory accuracy. WMS Biz uses a precise hierarchical location system.
The Hierarchy
Locations in WMS Biz follow this strict structure:
Warehouse -> Row -> Shelf -> Bin
- Warehouse: The physical building (e.g., "London DC").
- Row: A physical aisle or row of racking (e.g., "A", "B").
- Shelf: The vertical level on the racking (e.g., "01", "02").
- Bin: The specific cubby or tote on the shelf (e.g., "10", "11").
Example Location Code: LDC-A-01-10
Configuring Your Locations
To create new bins:
- Navigate to Settings in the left sidebar.
- Select the Warehouses tab.
- Click into your existing Warehouse (created during onboarding).
- Click + Add Bin Locations.
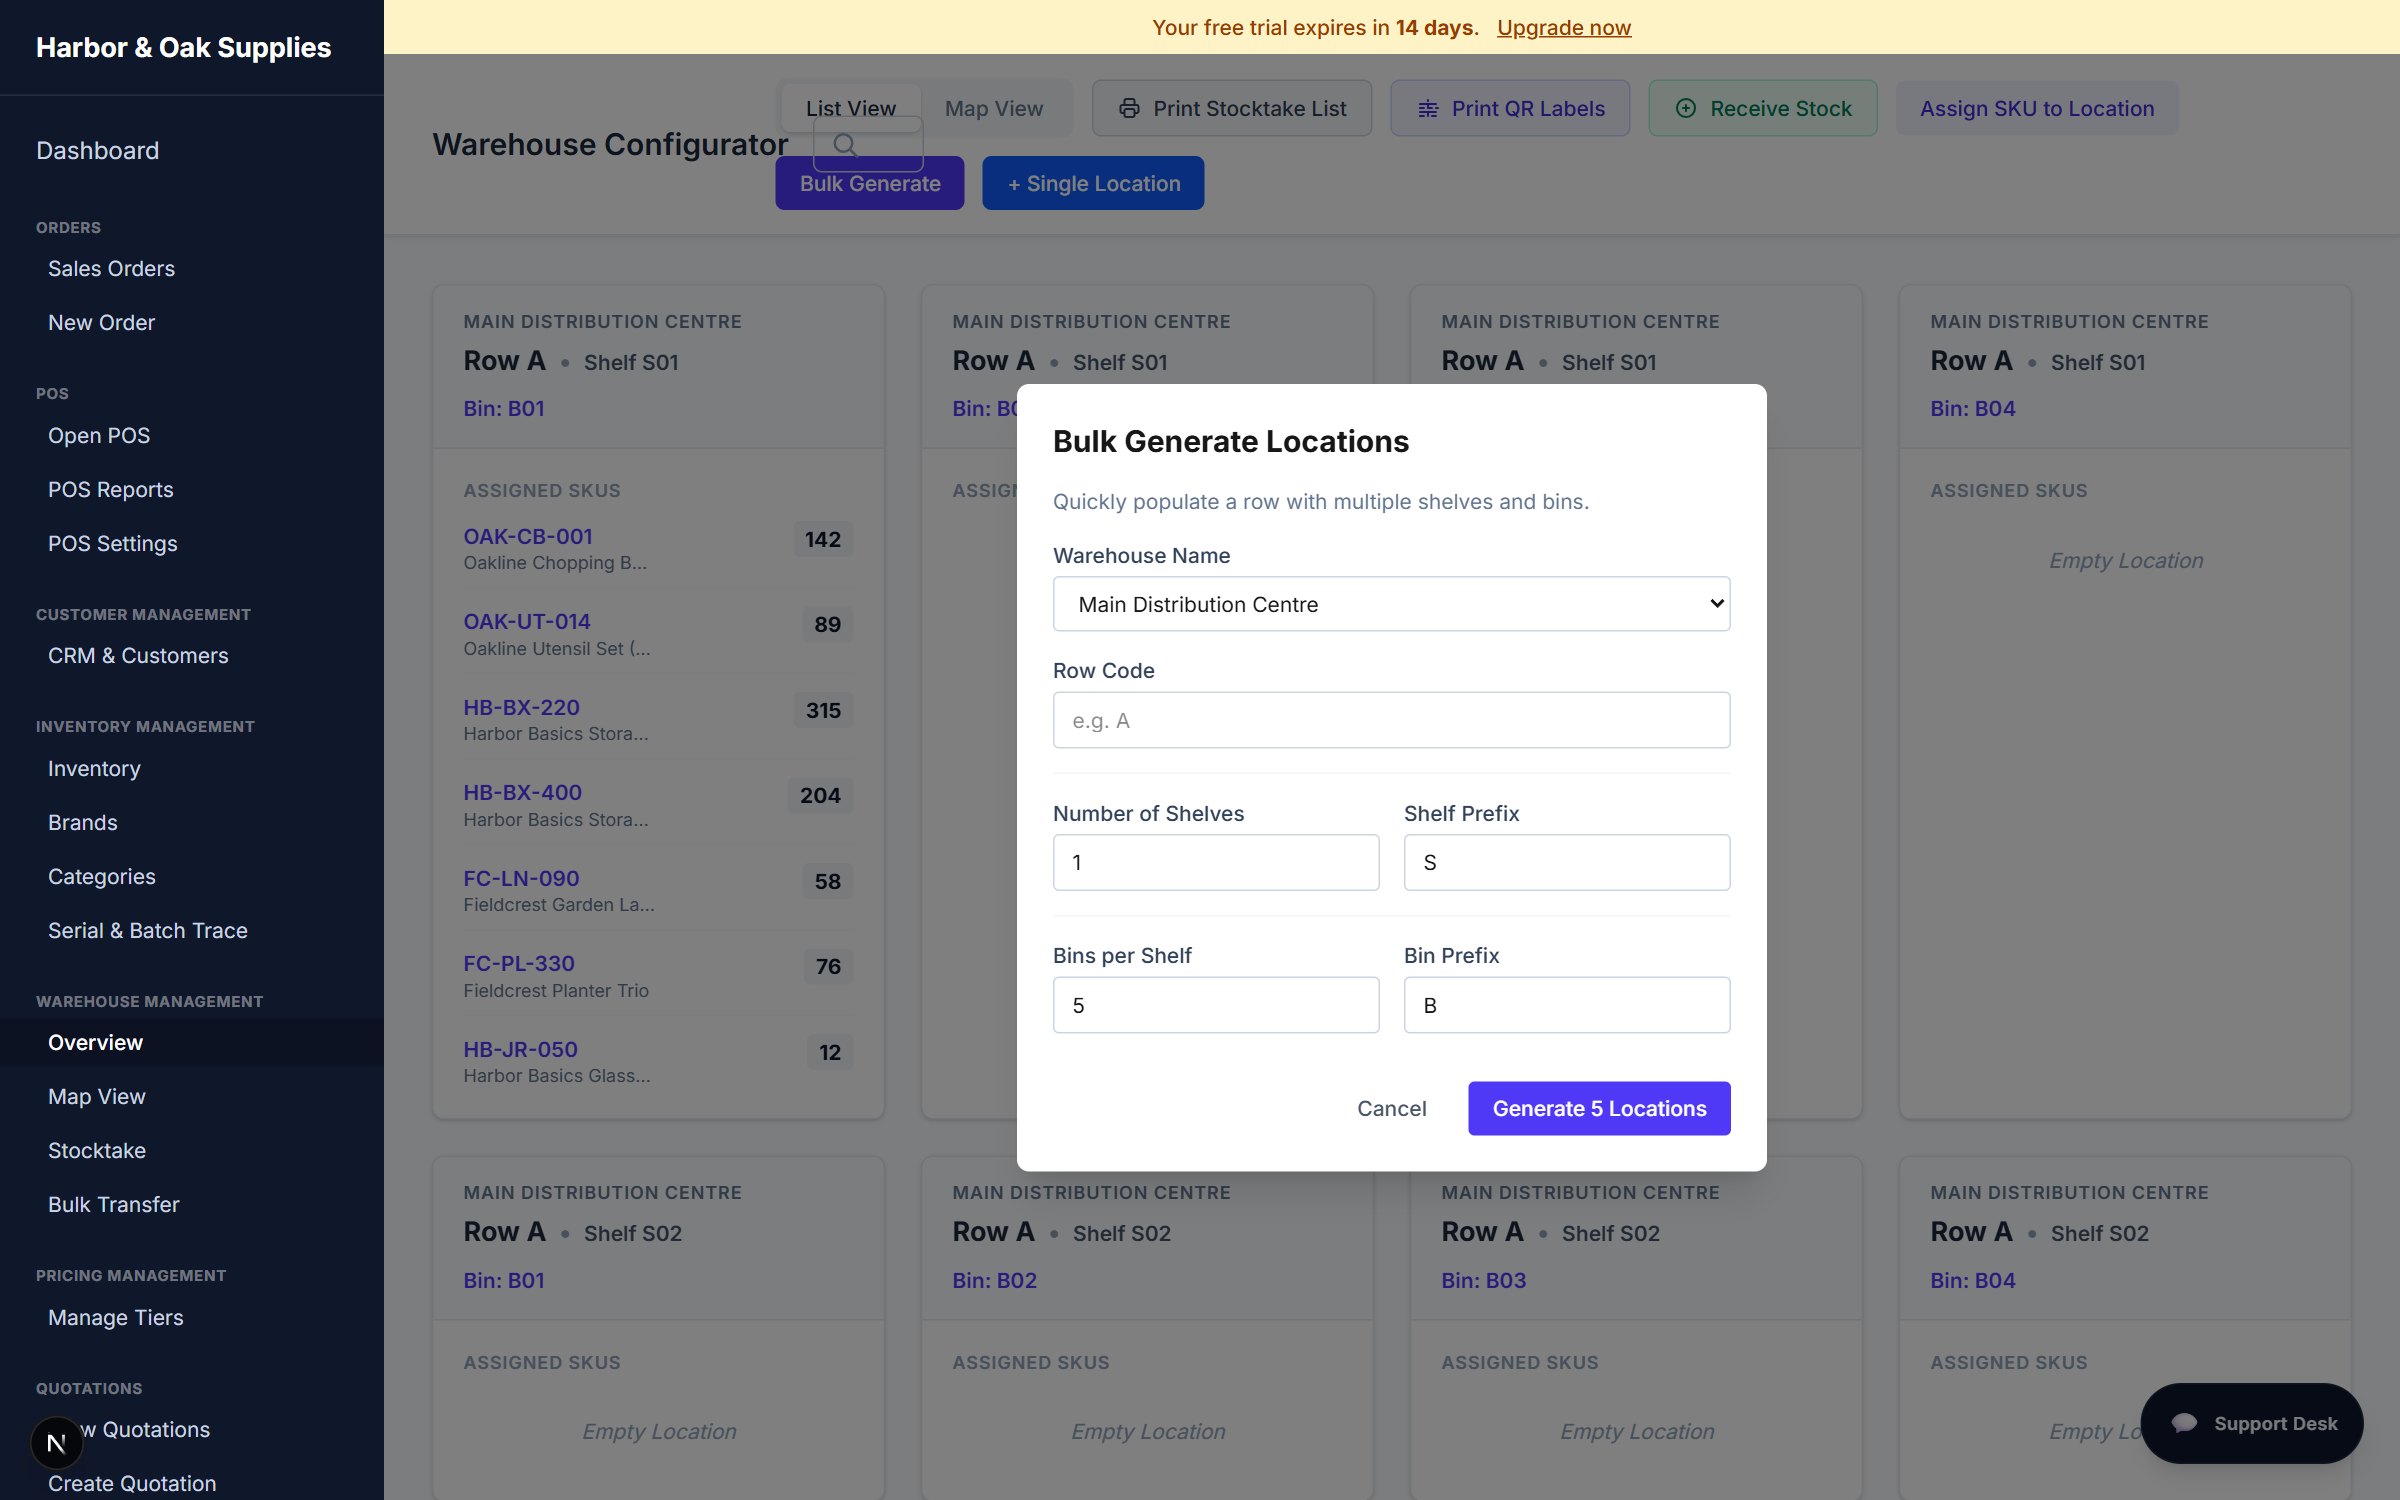
Mass Generation
You don't need to create bins one by one! The system allows for bulk generation. If you specify:
- Row:
A - Shelves:
1to3 - Bins per Shelf:
5
WMS Biz will instantly generate 15 distinct bin locations for you (A-01-01 through A-03-05).
Interactive 2D Warehouse Floor Map
To provide warehouse managers and operatives with real-time visual spatial intelligence, WMS Biz features an interactive 2D Bin Map floor plan of your warehouses:
- Spatial Floor Plan Layout: Visual layout representing physical Row, Shelf, and Bin racking arrangements.
- Color-Coded Status Indications:
- High Stock (Indigo/Blue): Bins containing high levels of inventory (≥ 50 units) to alert managers of spatial concentration.
- Low Stock (Amber/Yellow): Bins running low on inventory (< 50 units) that may require replenishment.
- Empty Bin (Dark/Translucent): Inactive/available slots ready for putaway.
- Picking Target (Emerald Green/Pulse): Active targets representing items currently queued on active pick waves.
- Hover Overlays (Tooltips): Hovering over any active bin displays a comprehensive info overlay showing:
- Bin Code (e.g.
B-01-A) - Inventory Status (High Stock, Low Stock, etc.)
- Lists of all current products stored in that bin (SKU, Product Name, Brand)
- Precise unit quantities per SKU.
- Bin Code (e.g.
Multi-Warehouse Controls
If your operations utilize more than a single facility:
- Use the Warehouse Toggle Selection at the top of the Warehouse Overview or Map View dashboards to instantly filter and display coordinates, bins, and maps of different facilities.
- The 2D floor plans and stock calculations dynamically refresh to map out only the bins belonging to the selected warehouse.
Barcode Scanning
Every generated Bin is assigned a unique system ID. If you print Bin Barcodes and place them on your physical racking, your warehouse operatives can scan them using the mobile interface during the Putaway and Picking processes to guarantee they are interacting with the correct location.
Isolated Location Stocktake (Cycle Counting)
WMS Biz enables you to run isolated physical audits rather than exporting your entire warehouse ledger.
- Navigate to Warehouse > Stocktake.
- Select a specific Warehouse, Row, or Shelf coordinate.
- The interface loads only the bins matching your filters and displays the expected quantity.
- As you type in counts, WMS Biz displays a variance calculation pill showing adjustments (+/- units) dynamically.
- Click Adjust to execute a cycle count transaction and instantly update system levels.
Bulk Inventory Transfers
To transfer products in bulk between bins:
- Navigate to Warehouse > Transfer.
- Use the Scanner Input to quickly laser scan item barcodes, or type a SKU/name to choose from dynamic auto-suggestions.
- Group duplicate scans automatically to increment counts instead of creating redundant rows.
- Set a Bulk Destination Bin at the top of the page to apply a target location to all rows in one click.
- WMS Biz validates available stock levels in real time and processes transfers sequentially, keeping any failed transfers on screen with error guides so you can fix and retry.
Manual Inbound Stock Receipt
For scenarios where stock is received outside of standard Purchase Orders (such as free sample arrivals, manual overrides, or initial inventory adjustments), you can receive items directly into specific bins:
- Navigate to Warehouse in the left sidebar.
- Click the Receive Stock button in the header.
- In the Manual Stock Receipt modal:
- Select the target Warehouse.
- Select the specific Bin location (filtered by the chosen warehouse).
- Search and select the Product SKU / Name from the autocomplete dropdown.
- Enter the Quantity to receive.
- Enter Notes describing the reason for the receipt (e.g., "Free promotional stock from supplier" or "Initial inventory setup").
- Click Receive Stock.
This action will immediately increment the bin's inventory count (creating a new inventory record if it doesn't already exist) and record a logged entry in the Stock Movements ledger under the RECEIVE movement type with your custom audit notes.