Getting Started with WMS Biz
Welcome to WMS Biz, the intelligent operating system for your warehouse and fulfillment operations. This guide will walk you through the very first steps of setting up your account.
Choosing Your Country at Signup
When you create your account, you'll be asked for your Country. This single choice configures your workspace automatically:
- Currency — e.g. £ for the UK, € for eurozone countries, A$ for Australia, C$ for Canada.
- Tax terminology and default rate — VAT (UK/EU), GST (Australia, New Zealand, Canada), or Sales Tax (US), with the standard national rate pre-filled.
- Address labels — Postcode vs. Zip Code, County vs. State, and so on throughout the app.
WMS Biz supports 32 countries: the United Kingdom, United States, Canada, Australia, New Zealand, and all EU member states. Dates and times always display in each user's own local format automatically. You can change your country and currency later under Settings > Company.
The Onboarding Wizard
When you log in for the very first time, you will be presented with a guided Setup Wizard. This wizard handles the structural provisioning of your environment.
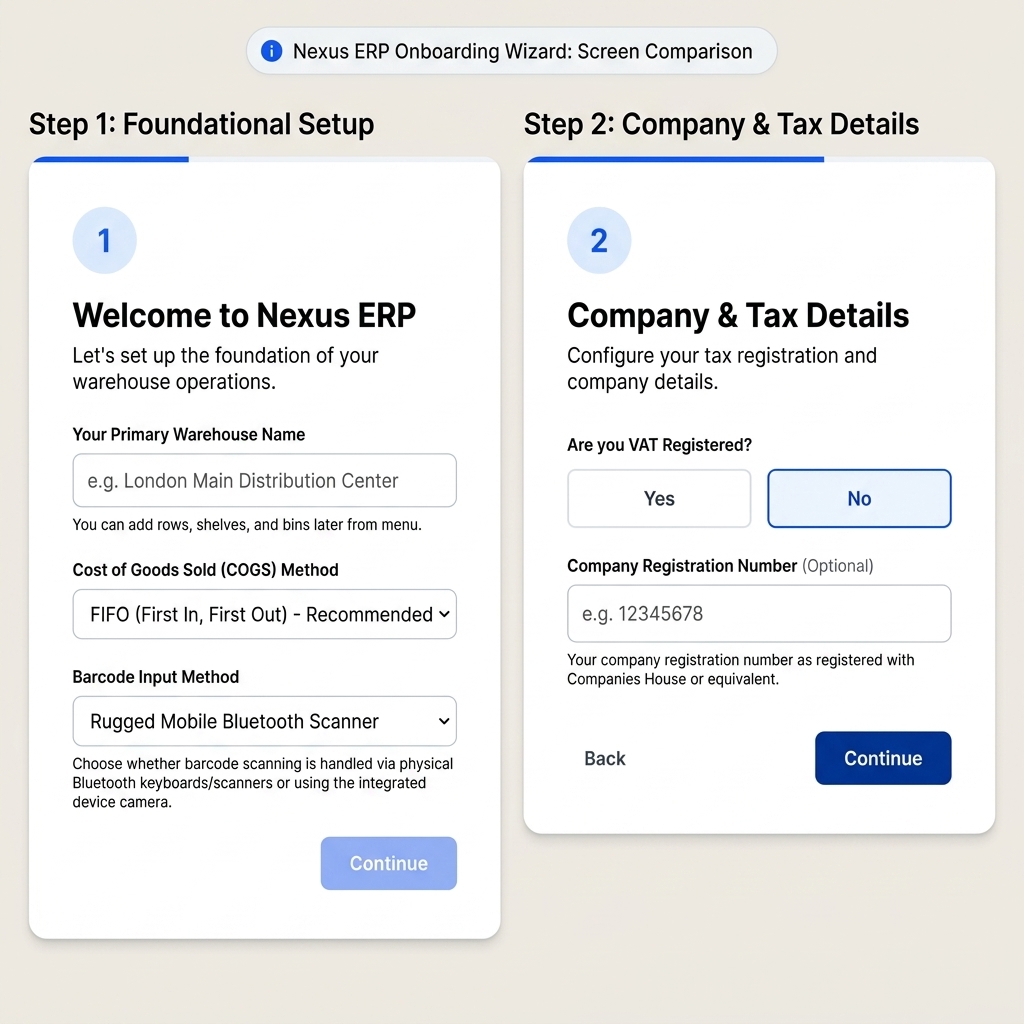
Step 1: Operations Foundation
- Country / Market: Pre-selected from your signup choice — confirm or change it here.
- Warehouse Name: Enter the name of your primary physical building (e.g., "Main Distribution Center"). The system will automatically create this record for you.
- Warehouse Storage Layout: Choose Single Location for a shop or small stockroom, or Multiple Shelves & Bins to bulk-generate rows, shelves, and bin codes for precise location tracking.
- Cost of Goods Sold (COGS) Method:
- Choose FIFO (First-In, First-Out) if you want to value your inventory based on the oldest purchase prices.
- Choose Weighted Average if you prefer a blended cost approach.
- Barcode Input Method:
- Choose Rugged Mobile Scanner (Default) if your warehouse operatives use dedicated handheld scanning terminals, rugged devices, or Bluetooth ring scanners.
- Choose Integrated Smartphone Camera if you want to scan codes directly using your phone's or tablet's built-in camera without extra hardware.
Step 2: Company & Tax Details
- Tax Registration: Tell the wizard whether you are VAT/GST registered. If yes, enter your registration number and confirm your default rate (pre-filled based on your country).
- Company Registration Number (optional): Your Companies House number or local equivalent, used on documents like invoices.
Step 3: Email Configuration
WMS Biz can automatically dispatch quotes, sales order confirmations, and invoices directly to your customers.
- SMTP Host & Port: Enter your email provider's SMTP details (e.g., SendGrid, SMTP2GO).
- Credentials: Enter your API Key or username/password.
Note: If you aren't ready to configure emails yet, you can click "Skip for now" and configure them later via Settings.
Step 4: Finish
Click Enter Dashboard — your warehouse, settings, and localization are provisioned and you're ready to go.
Accessing the Dashboard
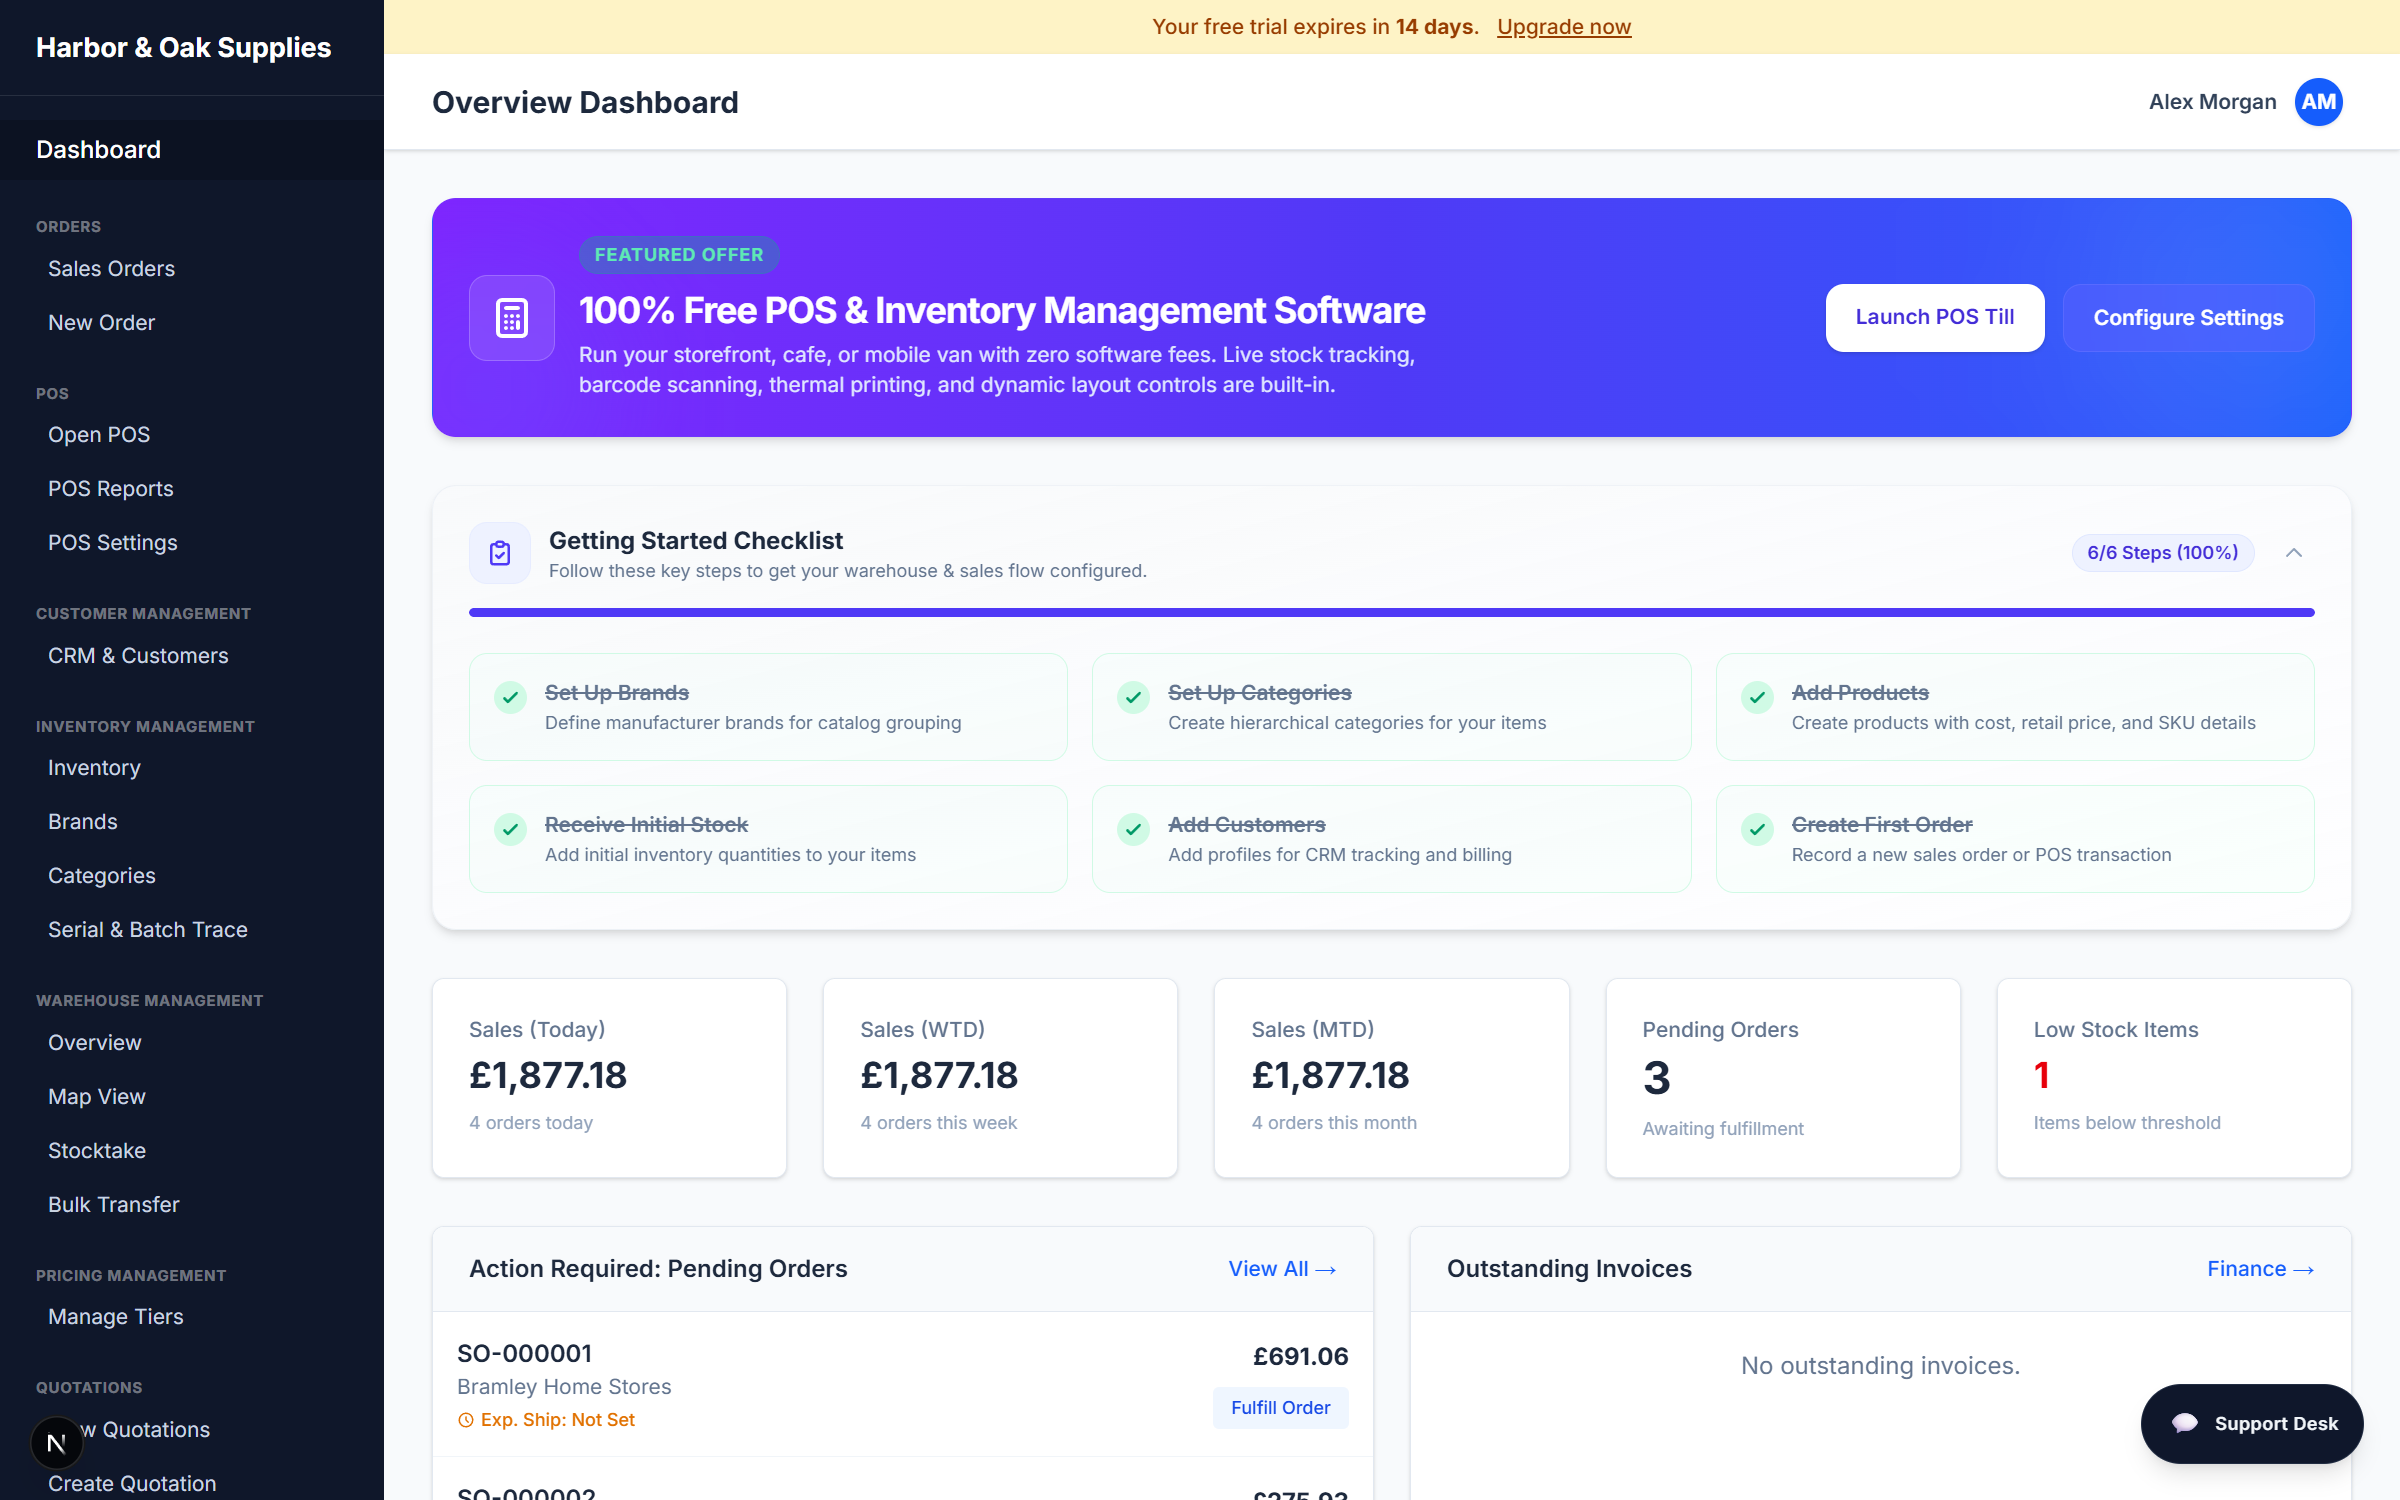
Once the wizard completes, you will be seamlessly redirected to the Main Dashboard. From here, you can navigate the entire ERP using the left-hand sidebar. The built-in Getting Started Checklist tracks your first six setup steps — brands, categories, products, initial stock, customers, and your first order.
Next Steps
Now that your core environment is provisioned, we highly recommend following these steps: